
Essential Tools for Transforming Old Kitchen Cabinets
Must-Have Supplies for DIY Cabinet Painting
When embarking on the journey of transforming old kitchen cabinets, having the right supplies is crucial. Here are the must-have items for a successful DIY cabinet painting project:
- Sanding Block or Electric Sander: This tool helps to remove old paint and smooth out surfaces.
- Primer: A high-quality primer is essential for better paint adhesion.
- Paint: Choose a durable paint that can withstand kitchen conditions. For guidance on selecting the right colors, explore paint color options that can enhance your cabinets.
- Drop Cloths: Protect floors and countertops from paint spills.
- Masking Tape: Use this to cover areas that should not be painted.
- Paint Tray: A paint tray makes it easier to apply paint evenly.
These supplies lay the groundwork for a successful transformation.
Choosing the Right Brushes and Rollers
Selecting the appropriate brushes and rollers can make all the difference in achieving a smooth finish. Here are some tips for choosing the right tools:
- Brushes: A high-quality angled brush is perfect for corners and detailed areas. A 2- to 3-inch brush works well for flat surfaces.
- Rollers: For larger areas, a roller with a medium nap (1/4 to 1/2 inch) can provide a smooth finish.
Tool Type | Recommended Size | Best For |
|---|---|---|
Brush | 2-3 inches | Flat surfaces and corners |
Roller | 1/4 – 1/2 inch | Larger, flat areas |
Choosing the right tools not only helps in applying paint evenly but also speeds up the process.
Understanding Different Paint Types for Kitchen Cabinets
In the world of cabinet painting, the type of paint used is vital. Here are some common paint types and their benefits:
- Acrylic Paint: Water-based and easy to clean up. It dries quickly and is less smelly.
- Oil-Based Paint: Offers a durable finish but takes longer to dry. It requires solvents for cleanup.
- Chalk Paint: Perfect for a matte finish and easy to distress for a vintage look.
Paint Type | Pros | Cons |
|---|---|---|
Acrylic | Fast-drying, easy cleanup | Less durable than oil-based |
Oil-Based | Very durable | Longer drying time, strong odor |
Chalk Paint | Unique finish, easy to distress | May need a topcoat for durability |
Understanding these paint types will help in making an informed decision, ensuring the cabinets look fresh and vibrant.
Step-by-Step Process for Painting Kitchen Cabinets
Preparing Cabinets for a Fresh Look
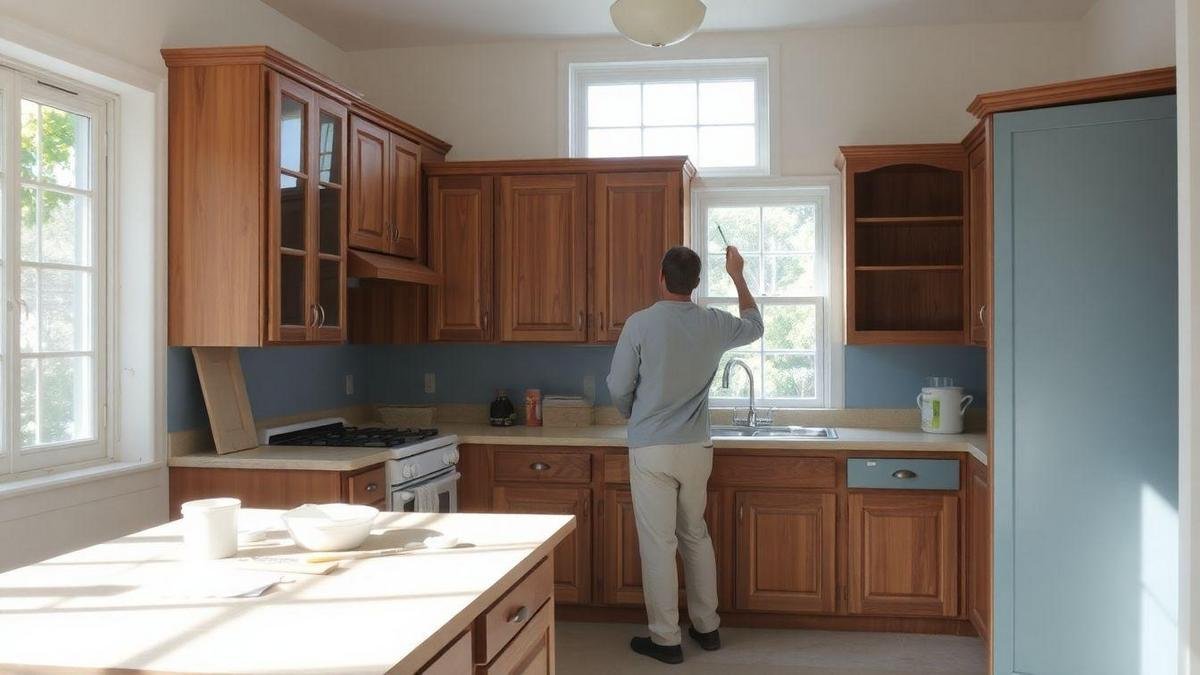
Before diving into the painting process, it’s essential to prepare the cabinets. This step is crucial for achieving a long-lasting finish. Start by clearing out all items from the cabinets. Then, remove the cabinet doors and hardware, such as knobs and hinges. It’s a good idea to label each door and its corresponding hardware to make reassembly easier later on.
Next, clean the surfaces thoroughly. Use a mixture of water and mild detergent to remove grease and dirt. After cleaning, allow the surfaces to dry completely. If the cabinets have a glossy finish, lightly sand them to help the paint adhere better. Wipe away any dust with a damp cloth.
Applying Paint Like a Pro
With the cabinets prepped, it’s time to apply the paint. Choose a high-quality paint specifically designed for cabinets. A semi-gloss or satin finish works well, as it provides durability and is easy to clean.
- Prime the Cabinets: Apply a coat of primer to seal the wood and help the paint stick. Use a paintbrush for corners and a roller for flat surfaces. Allow the primer to dry according to the manufacturer’s instructions.
- Paint the Cabinets: Once the primer is dry, apply the first coat of paint. Use a brush for edges and a roller for larger areas. After the first coat dries, inspect for any imperfections and sand lightly if needed.
- Apply Additional Coats: Depending on the color and type of paint, a second or third coat may be necessary. Each coat should be allowed to dry completely before applying the next.
Tips for Achieving a Smooth Finish
To achieve that smooth, professional finish, consider the following tips:
- Use Quality Tools: Invest in good brushes and rollers. They can make a significant difference in the final look.
- Thin Coats: Apply thin coats of paint. Thick coats can lead to drips and uneven surfaces.
- Sand Between Coats: Lightly sand between coats to create a smooth surface for the next layer.
- Temperature Matters: Paint in a well-ventilated area at a moderate temperature. Extreme heat or cold can affect drying times and finish quality.
Best Paint Options for Kitchen Cabinet Transformation
Comparing Oil-Based vs. Water-Based Paint
When choosing paint for kitchen cabinets, oil-based and water-based paints are the two main options. Each type has its own set of advantages and drawbacks.
Feature | Oil-Based Paint | Water-Based Paint |
|---|---|---|
Drying Time | Slower drying time | Quick drying time |
Durability | Highly durable | Less durable than oil-based |
Odor | Strong odor | Low odor |
Cleanup | Requires solvents | Soap and water cleanup |
Finish | Smooth, glossy finish | Matte to satin finishes available |
Oil-based paints are great for a hard, glossy finish that stands the test of time. However, they take longer to dry and have a strong smell. On the other hand, water-based paints dry quickly and are easier to clean up, making them a popular choice for DIY projects. Ultimately, the decision may hinge on personal preference and specific project needs.
Top Brands for Cabinet Makeover Ideas
Several brands stand out when it comes to cabinet painting. Here are some top choices:
- Benjamin Moore: Known for its rich colors and high quality.
- Behr: Offers a range of options at a reasonable price.
- Rust-Oleum: Specializes in cabinet transformations with easy-to-use kits.
- Sherwin-Williams: Provides a variety of finishes and colors for a polished look.
These brands not only offer varied selections but also have high customer satisfaction ratings. They are well-equipped to handle the demands of kitchen cabinet transformations.
Selecting Colors That Enhance Your Kitchen
Choosing the right colors can significantly impact the overall feel of the kitchen. Here are some tips for selecting colors:
- Light Colors: Create a sense of openness and brightness.
- Dark Colors: Add depth and sophistication.
- Bold Colors: Make a statement and add personality.
- Neutral Colors: Provide a timeless and versatile backdrop.
Consider the existing elements in the kitchen, such as countertops and flooring, when making color choices. A well-chosen color can turn an ordinary kitchen into a stunning space.
Common Mistakes in DIY Cabinet Painting
Avoiding Poor Preparation Techniques
When embarking on the journey of DIY cabinet painting, many individuals overlook the importance of proper preparation. Skipping steps like cleaning and sanding can lead to a less-than-stellar finish. Cleaning cabinets thoroughly removes grease and dirt, which can interfere with paint adhesion. Sanding creates a rough surface for the paint to grip, ensuring a smooth and lasting coat.
Here are some common preparation mistakes to avoid:
Mistake | Consequence |
|---|---|
Not cleaning properly | Paint may peel or chip quickly |
Skipping sanding | Uneven surface leads to poor paint application |
Ignoring repairs | Cracks or damage will show through the paint |
Recognizing Signs of Inadequate Coverage
Inadequate coverage can turn a fresh coat of paint into a disappointing sight. It’s crucial to recognize signs that indicate the need for additional layers. Streaks, uneven color, and visible wood grain are all signs that the cabinets may require more paint.
To achieve a fresh look, consider these tips:
- Apply multiple thin coats instead of one thick coat.
- Use a high-quality brush or roller to avoid streaks.
- Allow adequate drying time between coats.
Learning from Others’ Cabinet Painting Tips
Learning from the experiences of others can be invaluable. Many DIY enthusiasts have shared their tips and tricks for successful cabinet painting. One common piece of advice is to test paint colors on a small area first. This helps visualize the final look without committing to a whole cabinet.
It’s also beneficial to join online forums or local groups where people share their cabinet painting journeys. This community can provide support, answer questions, and offer insights that can make the process smoother.
Creative Ideas for Rejuvenating Kitchen Cabinets
Incorporating Two-Tone Cabinet Designs
Two-tone cabinet designs offer a fresh twist to any kitchen. By combining two different colors, one can create a striking visual appeal. For instance, pairing a dark navy blue with a soft white can add depth and sophistication. This design not only enhances aesthetics but also allows for personal expression.
Here are a few tips for achieving this look:
- Choose contrasting colors: Light and dark combinations work best.
- Balance the colors: Use one color for upper cabinets and another for lower cabinets.
- Consider the overall theme: Ensure the colors align with the kitchen’s style.
Using Stencils and Patterns for Unique Looks
Stencils and patterns can transform ordinary cabinets into eye-catching features. This method allows for creativity without a complete overhaul. For example, a floral stencil can bring a touch of nature indoors, while geometric patterns can add a modern flair.
Steps to consider when using stencils:
- Select a design: Choose a pattern that reflects personal style.
- Use painter’s tape: This helps to secure the stencil and prevent paint bleed.
- Apply paint carefully: A sponge or brush can be used for an even finish.
Exploring Affordable Cabinet Upgrades
Upgrading cabinets doesn’t have to break the bank. There are several affordable options that can yield impressive results. Here are a few to explore:
Upgrade Option | Description |
|---|---|
New Hardware | Replacing knobs and pulls can instantly refresh the look. |
Paint | A new color can breathe life into tired cabinets. |
Contact Paper | This is a budget-friendly way to add patterns or colors. |
Open Shelving | Removing some cabinet doors can create an airy feel. |
These simple changes can make a significant impact, making cabinets look brand new without a hefty price tag.
Maintenance Tips After Transforming Old Kitchen Cabinets
Cleaning Techniques to Preserve Finish
To keep transformed kitchen cabinets looking their best, cleaning is key. Regularly wipe down surfaces with a damp cloth to remove dust and grime. For deeper cleaning, a mixture of warm water and mild soap works wonders. Avoid harsh chemicals that can damage the finish. A gentle cleaner will help maintain the luster and protect the paint. For additional cleaning tips, refer to effective cleaning techniques.
- Damp Cloth: Use it for daily dusting.
- Mild Soap Solution: Perfect for weekly cleaning.
- Avoid Harsh Chemicals: They can dull the finish.
Regular Touch-Ups to Maintain Appearance
Over time, cabinets may suffer from wear and tear. Regular touch-ups can keep them looking fresh. If scratches or chips appear, a small amount of matching paint can cover these blemishes. Keeping a small jar of leftover paint handy is a smart move. This way, you can quickly address any imperfections without a complete repaint.
- Keep Paint Handy: For quick fixes.
- Inspect Regularly: Look for scratches or chips.
- Touch-Up Brush: Use a fine brush for precision.
Knowing When to Repaint for Longevity
Even with the best care, cabinets may need a repaint after several years. Signs that it’s time include noticeable fading, peeling, or a rough texture. If the cabinets have lost their sheen, a fresh coat can breathe new life into them. It’s wise to plan for this every few years to keep the kitchen looking its best.
Signs to Repaint | Action Needed |
|---|---|
Noticeable fading | Consider repainting |
Peeling paint | Time for a fresh coat |
Rough texture | Repaint for smooth finish |